老高往期回顾:
咱们做了N5105在PVE下LXC套娃Docker安装jellyfin,当时使用了Jellyfin大神nyanmisaka的docker,得益于其中集成的驱动实现N5105核显硬解和转码。缺点是只能用这个docker,其他的emby jellyfin,plex不能用,因为缺少了驱动。因为老高用Emby比较多,当时为了吃上N5105的核显,如果不用Winserver+hyper的话,PVE下Emby搜遍全网也找不到相关信息。
本期视频以Emby为例,算是全网首发(如有雷同纯属巧合)分享我们自己安装驱动,自由选择媒体服务器应用。搬好小板凳坐好~自备瓜子,啤酒,可乐~正片开始啦……
感谢您的关注订阅🙏,三连投币转发 充电是对我最大的支持和鼓励!🙏我会继续努力做出更多的高质量视频!加爱折腾的群和讨论组:https://diyforfun.565856.xyz/ 爱折腾的老高欢迎您加入和有着共同折腾爱好的朋友们一起:折腾的开心!开心的折腾!


Proxmox VE 7.x 换源
SSH登录到pve后台,然后一条一条的执行命令
一、PVE换源:
1、更换为国内清华源:
将自带的源文件sources.list备份
cp /etc/apt/sources.list /etc/apt/sources.list_bak编辑sources.list
nano /etc/apt/sources.list粘贴一下内容
deb https://mirrors.tuna.tsinghua.edu.cn/debian/ bullseye main contrib non-free
deb https://mirrors.tuna.tsinghua.edu.cn/debian/ bullseye-updates main contrib non-free
deb https://mirrors.tuna.tsinghua.edu.cn/debian/ bullseye-backports main contrib non-free
deb https://mirrors.tuna.tsinghua.edu.cn/debian-security bullseye-security main contrib non-free
ctrl+x y 回车保存退出
编辑pve企业源:
nano /etc/apt/sources.list.d/pve-enterprise.list将其中原有的proxmox句首加# 注释掉,变为:#deb https://enterprise.proxmox.com/debian/pve bullseye pve-enterprise
添加以下清华源:
deb https://mirrors.tuna.tsinghua.edu.cn/proxmox/debian bullseye pve-no-subscriptionctrl+x y 回车保存退出
更新并升级
apt update && apt dist-upgrade -y2、LXC更换为清华源:
备份APLInfo.pm
cp /usr/share/perl5/PVE/APLInfo.pm /usr/share/perl5/PVE/APLInfo.pm_back更换为清华源:
sed -i 's|http://download.proxmox.com|https://mirrors.tuna.tsinghua.edu.cn/proxmox|g' /usr/share/perl5/PVE/APLInfo.pm
重启服务后生效
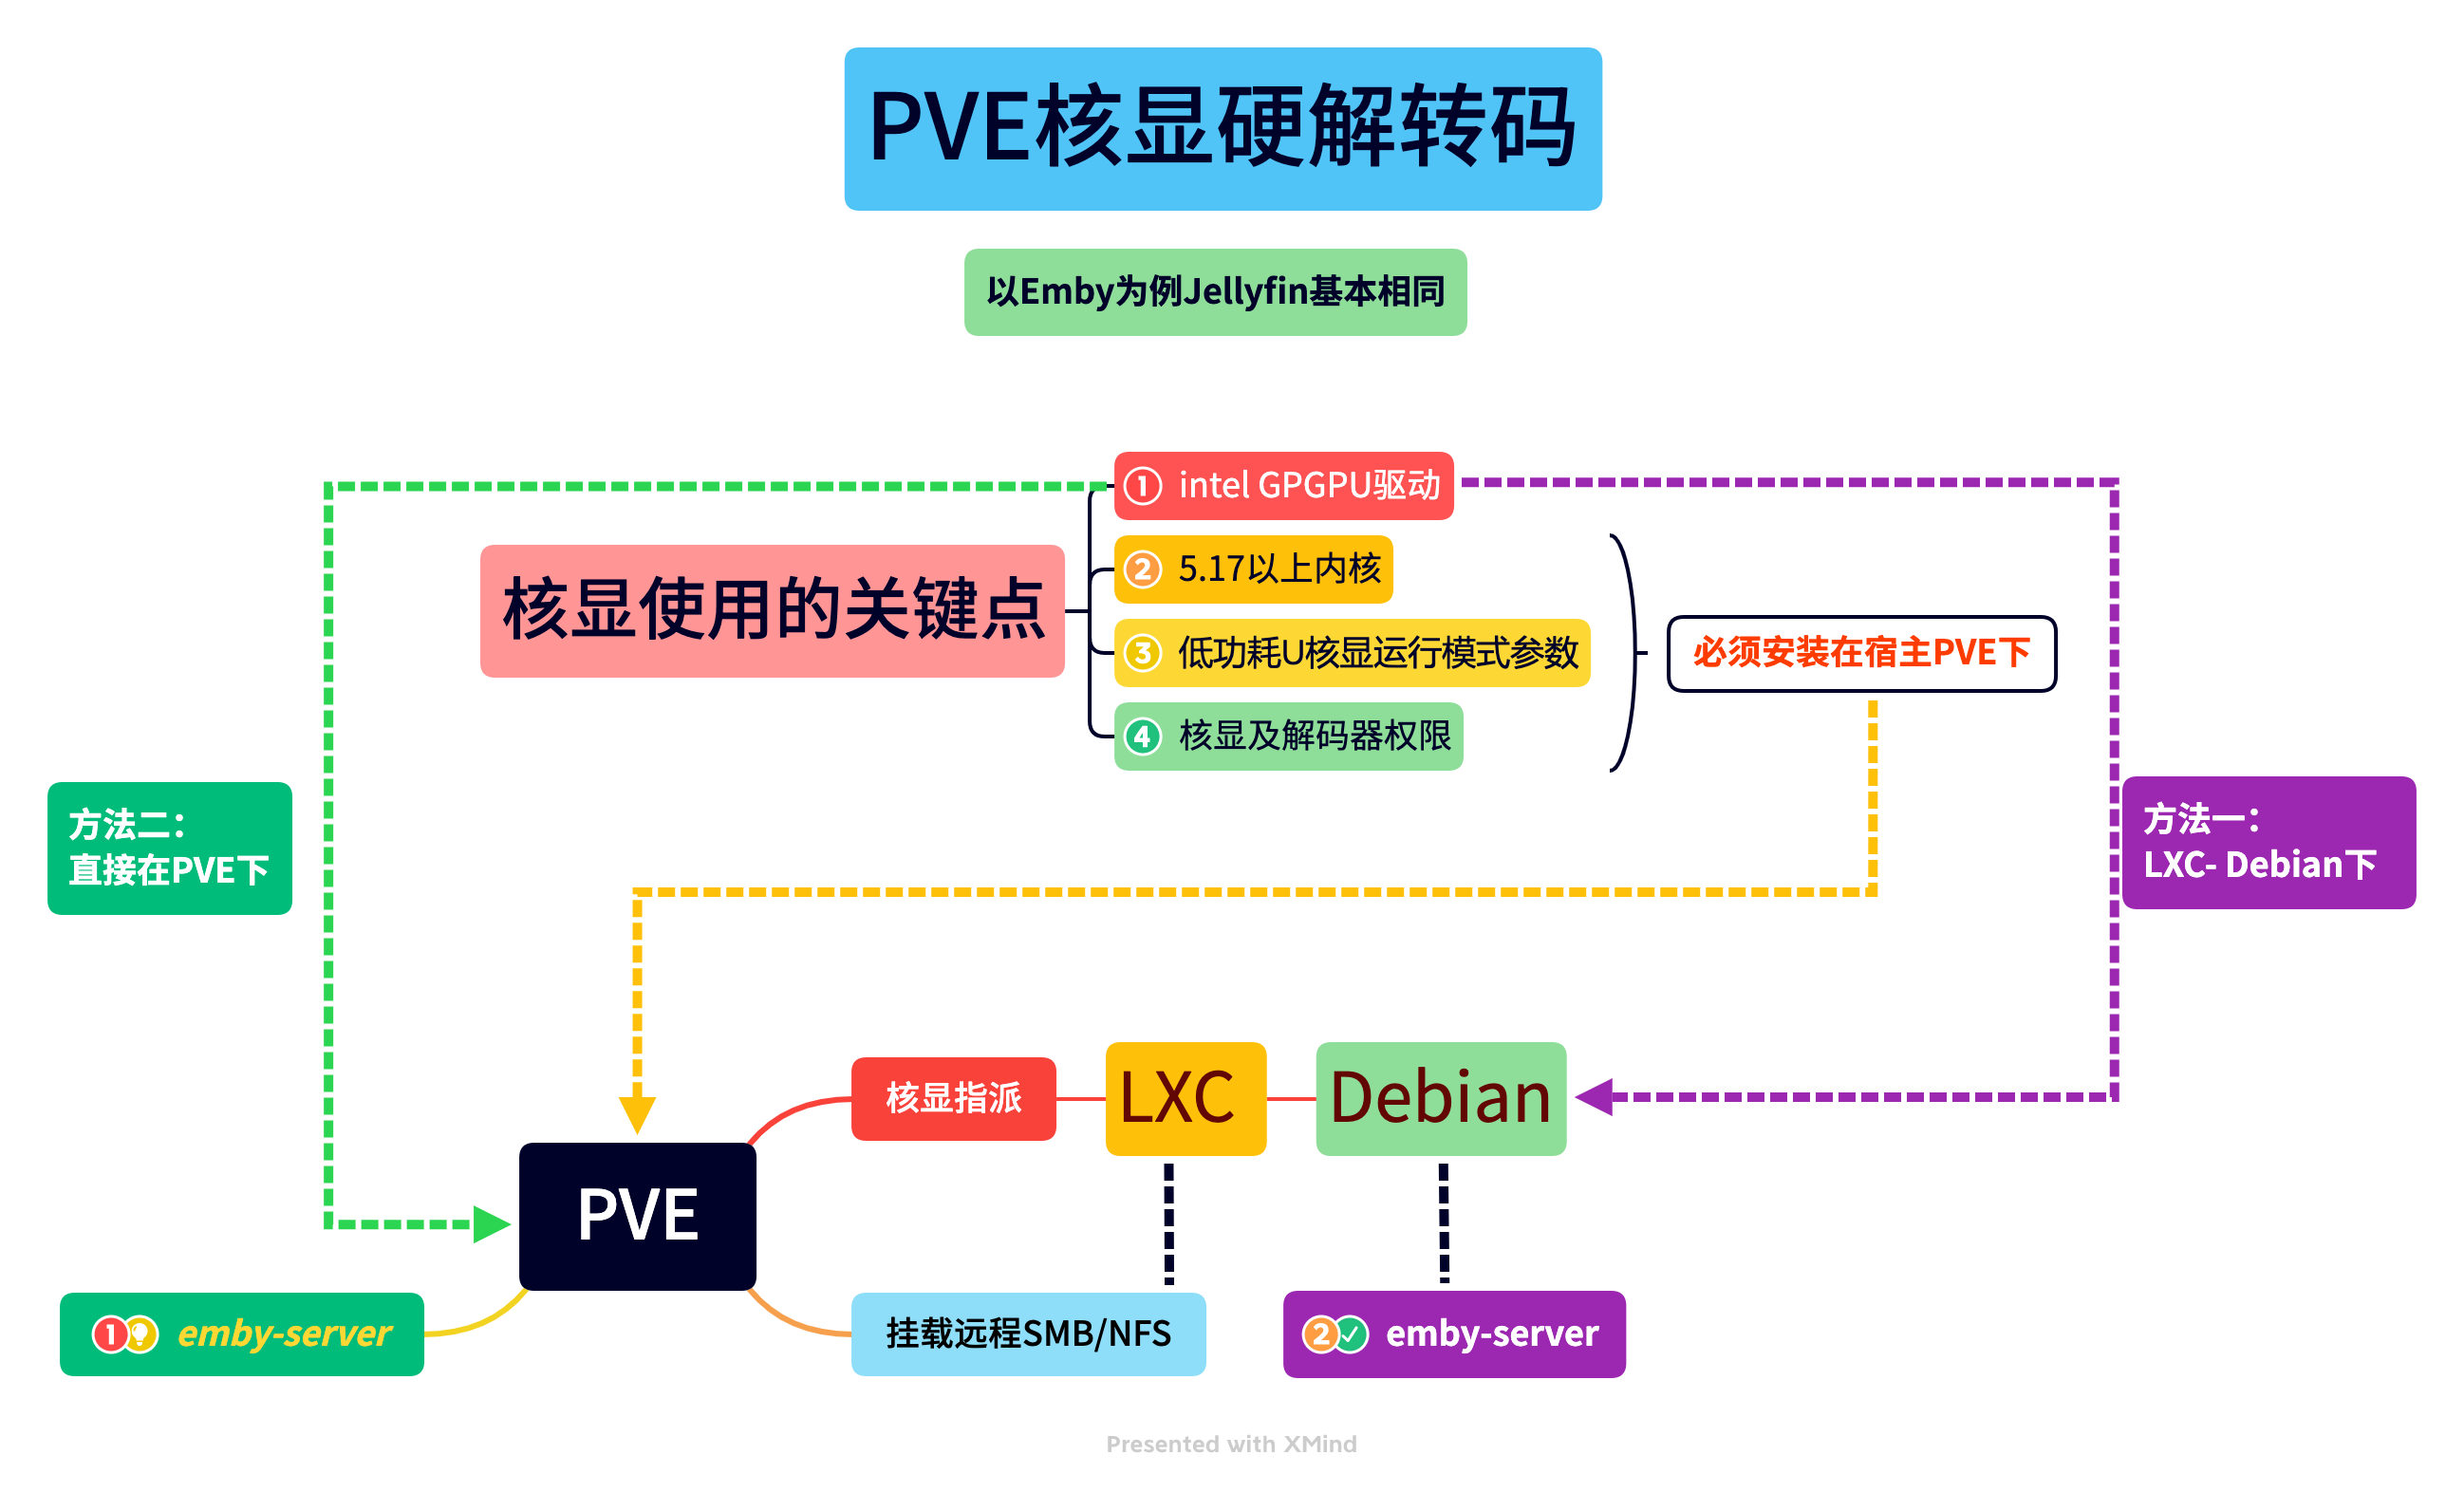
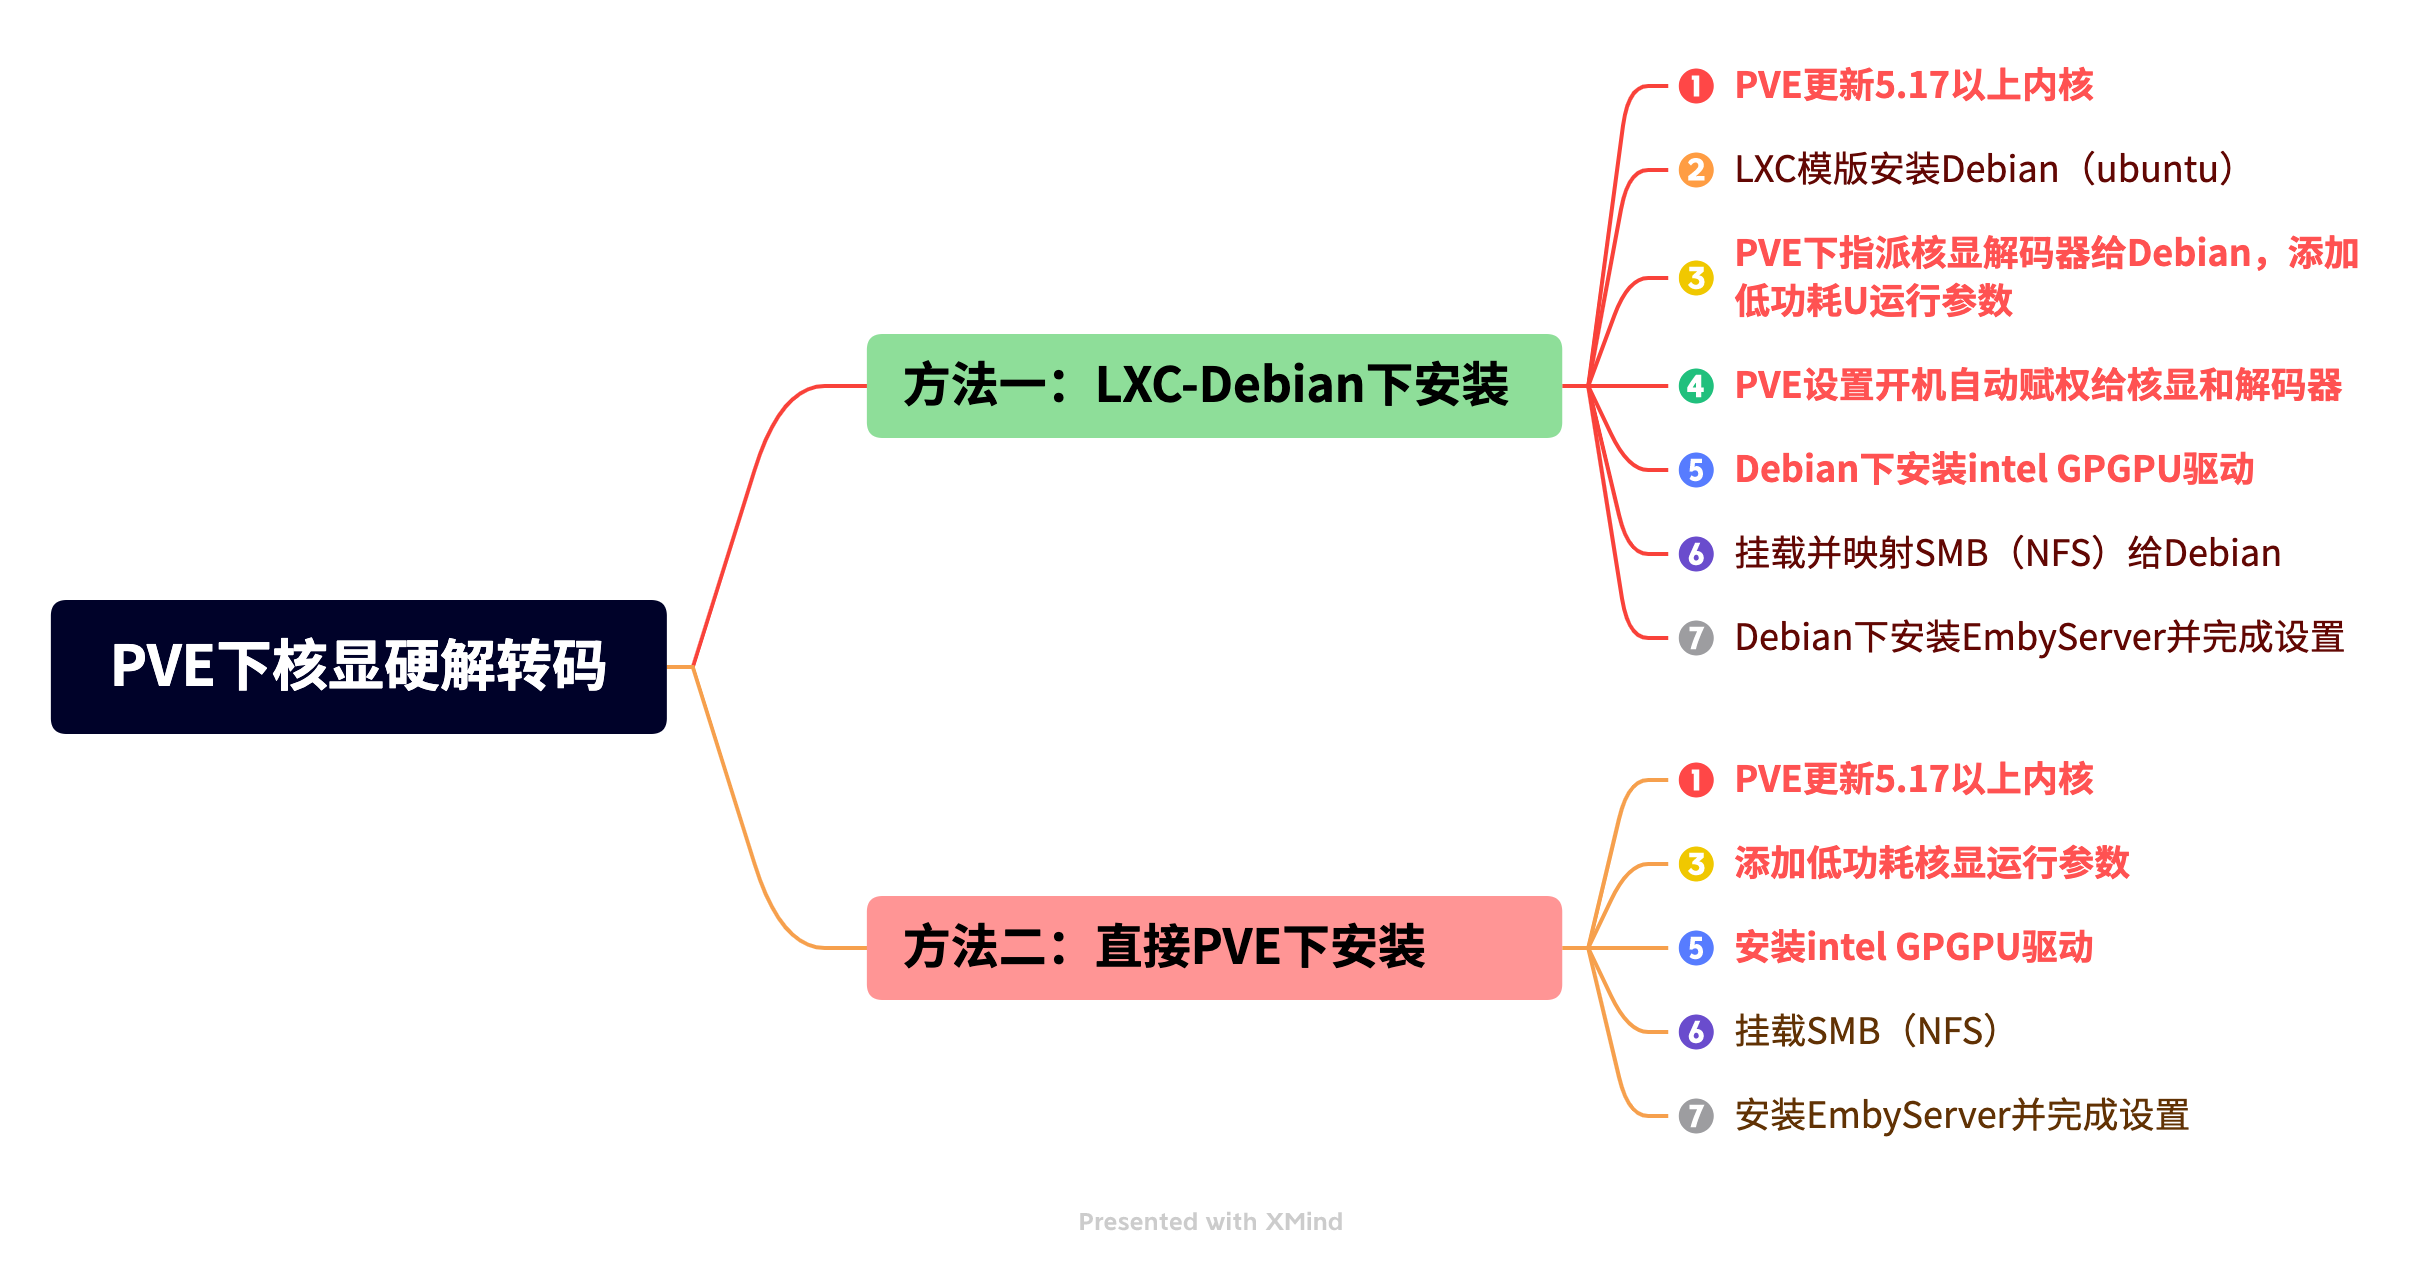
systemctl restart pvedaemon.service方法一:核显硬解简便方法:PVE下直接安装embyserver
确保PVE已经升级到7.3-3及以上版本
1、更新PVE内核到5.19(2022-9-13官网更新)
apt update
apt install pve-kernel-5.19
2、检查PVE下915 guc huc dmc固件是否齐全(正常情况下PVE7.3-3默认系统自带)
cd /lib/firmware/i915 && ls ehl_guc*.bin && ls ehl_huc*.bin && ls icl_dmc*.bin是否包含以下固件,如果齐全进步骤3
ehl_guc_70.1.1.bin
ehl_huc_9.0.0.bin
icl_dmc_ver1_09.bin
如不全,则补全缺少的915 guc huc dmc固件
mkdir -p /lib/firmware/i915 && cd /lib/firmware/i915
curl -LO https://git.kernel.org/pub/scm/linux/kernel/git/firmware/linux-firmware.git/plain/i915/ehl_guc_70.1.1.bin
curl -LO https://git.kernel.org/pub/scm/linux/kernel/git/firmware/linux-firmware.git/plain/i915/ehl_huc_9.0.0.bin
curl -LO https://git.kernel.org/pub/scm/linux/kernel/git/firmware/linux-firmware.git/plain/i915/icl_dmc_ver1_09.bin
3、添加低功耗U核显运行模式参数(大补丸)
nano /etc/modprobe.d/i915.conf粘贴:
options i915 enable_guc=3ctrl+x,y,回车
reboot 重启后验证低功耗编码HuC和GuC是否开启命令如下:
journalctl -b -o short-monotonic -k | egrep -i "i915|dmr|dmc|guc|huc"返回信息中有以下HuC和GuC成功开启:
[ 3.862964] pve kernel: i915 0000:00:02.0: [drm] Finished loading DMC firmware i915/icl_dmc_ver1_09.bin (v1.9)
[ 3.884978] pve kernel: i915 0000:00:02.0: [drm] GuC firmware i915/ehl_guc_70.1.1.bin version 70.1
[ 3.884987] pve kernel: i915 0000:00:02.0: [drm] HuC firmware i915/ehl_huc_9.0.0.bin version 9.0
[ 3.899160] pve kernel: i915 0000:00:02.0: [drm] HuC authenticated
[ 3.899505] pve kernel: i915 0000:00:02.0: [drm] GuC submission enabled
4、挂载NAS NFS(smb)
NAS以群晖NFS为例,操作见视频
5、安装emby-server Debian版
(之所以没用4.7正式版是因为渲染有bug,会卡住掉渲染器)
下载emby-server安装包
cd /root
wget https://github.com/MediaBrowser/Emby.Releases/releases/download/4.8.0.19/emby-server-deb_4.8.0.19_amd64.deb
执行安装
dpkg -i emby-server-deb_4.8.0.19_amd64.deb开机启动(运行)
systemctl enable emby-server关闭开机启动(备用)
systemctl disable emby-server启动服务(运行)
systemctl start emby-server停止服务(备用)
systemctl stop emby-server重启服务(备用)
systemctl restart emby-server查看服务状态(运行)
systemctl status emby-server结束服务进程(服务无法停止时备用)
systemctl kill emby-server删除(备用)
dpkg -r emby-server连同配置文件一起删除(备用)
dpkg -P emby-serverembyserver安装完成,目录在opt下。(可定期备份,重装时可还原,节省刮削媒体库时间)
6、安装GPU监控应用
apt-get update && apt install intel-gpu-toolsinstall_gpu_top7、登录emby地址初始化安装:
http://localhost:8096
设置地区,语言,管理员账户及密码
设置媒体库,添加媒体库(关联以上挂载的nas smb文件夹),并扫描媒体库文件
输入密匙
转码内——高级——勾选硬件加速器——HDR色彩设置仅硬件加速
 爱折腾的老高博客


